blogit.vapaasuomi.fi

August 03, 2022

Ville-Pekka Vainio

How to find the current ChromeOS Flex image

Edit: The quick answer to the question by a reader of my blog, Julien:

The info to download Chrome OS Flex from Linux is a bit hidden, but official info and link is available here: https://support.google.com/chromeosflex/answer/11543105?hl=en#zippy=%2Chow-do-i-create-a-chromeos-flex-usb-installer-on-linux

My dad has an Acer Chromebook 14 CB3-431, codenamed Edgar. Google just stopped supporting it with ChromeOS, but it’s still working well. Luckily, Google also just released the first stable version of ChromeOS Flex.

I decided to install the full UEFI image to the Chromebook from https://mrchromebox.tech/ so that starting Flex would be as easy as possible. That went well after finding and removing the write protect screw.

But it wasn’t too easy to find the URL to download the current ChromeOS Flex installation image. Google’s Chromebook recovery extension for Chrome does not work on Linux. By reading through some reddit threads, I found out that you can get the download URLs from this json file: https://dl.google.com/dl/edgedl/chromeos/recovery/cloudready_recovery2.json So as of this writing, the current image is https://dl.google.com/dl/edgedl/chromeos/recovery/chromeos_14816.99.0_reven_recovery_stable-channel_mp-v2.bin.zip

Use dd to write the image straight to a USB stick (not to a partition) and you should be good to go. Flex installs pretty much like a regular Linux distribution and seems to work well.

by Ville-Pekka Vainio at August 03, 2022 04:02 PM

July 03, 2022

Ville-Pekka Vainio

SAS2008 LBA, Seagate Ironwolfs and scary log messages

I built a home NAS two years ago, that was the first COVID summer and I finally had the time. It’s running Proxmox, which is running TrueNAS (then Core, now Scale) as a VM. An HBA card is passed directly to the TrueNAS VM. The HBA card is a Dell PERC H310, but I’ve crossflashed it so that now it shows up as an LSI SAS2008 PCI-Express Fusion-MPT SAS-2. The system originally had five ST4000VN008 disks (4 TB) in a RAIDZ2.

Pretty much from the beginning I noticed the system was spewing out storage related error messages when booting up. ZFS also noticed, but after the TrueNAS VM was completely up, there were no more errors and I quite rarely rebooted or shut down the system, so I wasn’t too worried. The few read errors I got each boot I cleared with zpool clear, which probably was not the best idea.

Last summer we had very cheap electricity here in Finland, something like 1-3 c/kWh plus transfer and taxes. Well, this summer it can be even 60 c/kWh during the worst times. I started shutting down my NAS when I knew we would not need it for a while. This made the disk issues worse.

I know the high electricity prices are partly due to Russia’s attack in Ukraine and the sanctions against Russia. I completely support Ukraine, they are fighting for the freedom of all of the Eastern EU border states. Please donate to support Ukraine.

TrueNAS keeps only one day of systemd journal data (why?) so I’ve already lost the actual error messages. By going through my Google search history I was able to find some of the errors I got. They were like this:

Unaligned partial completion ...
tag#0 FAILED Result: hostbyte=DID_OK driverbyte=DRIVER_SENSE ...
print_req_error: critical medium error ... 

Because there’s quite a lot of discussion on the web about Ironwolf firmware issues, issues with NCQ etc. I hoped this was something that could be fixed with software. I tried passing many kernel options found by googling to the TrueNAS Scale kernel. I came up with libata.force=noncq mpt3sas.msix_disable=1 mpt3sas.max_queue_depth=10000. For more discussion on these issues, see here, here, here, here. Seagate has actually released a firmware update from SC60 to SC61 for the larger Ironwolfs, but I have the 4 TB ones without an update available.

None of these options helped. Eventually the whole disk just disappeared. At this point it was clear to me that the issue was not a kernel bug, a disk firmware bug, an HBA firmware bug or anything like that. The disk had been faulty already on arrival.

I noticed Seagate has come up with new versions of the Ironwolfs. The 4 TB version is now ST4000VN006 with 256 MB of cache instead of 64 MB. The new version is also physically thinner and might run cooler. I ordered one of those. Unfortunately the firmware version is still SC60.

I replaced the faulty disk with the new one, ZFS resilvered the pool in about 8 hours and all is good again. I guess the moral of the story is that it seems like a disk could be defective, it probably is and you should start by replacing it.

by Ville-Pekka Vainio at July 03, 2022 03:50 PM

January 26, 2022

Losca

Unboxing Dell XPS 13 - openSUSE Tumbleweed alongside preinstalled Ubuntu

A look at the 2021 model of Dell XPS 13 - available with Linux pre-installed

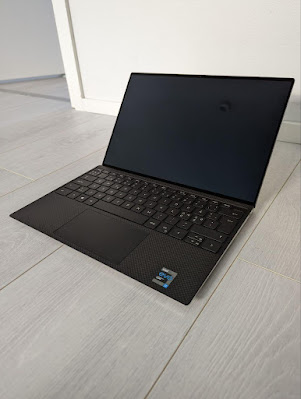
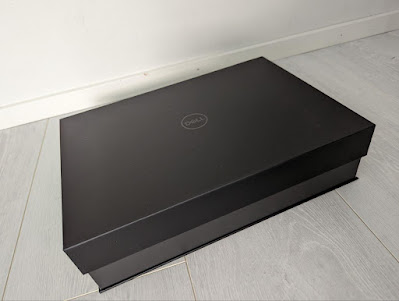
I received a new laptop for work - a Dell XPS 13. Dell has been long famous for offering certain models with pre-installed Linux as a supported option, and opting for those is nice for moving some euros/dollars from certain PC desktop OS monopoly towards Linux desktop engineering costs. Notably Lenovo also offers Ubuntu and Fedora options on many models these days (like Carbon X1 and P15 Gen 2).
black box

opened box

accessories and a leaflet about Linux support

laptop lifted from the box, closed

laptop with lid open

Ubuntu running

openSUSE runnin
 
Obviously a smooth, ready-to-rock Ubuntu installation is nice for most people already, but I need openSUSE, so after checking everything is fine with Ubuntu, I continued to install openSUSE Tumbleweed as a dual boot option. As I’m a funny little tinkerer, I obviously went with some special things. I wanted:
  • Ubuntu to remain as the reference supported OS on a small(ish) partition, useful to compare to if trying out new development versions of software on openSUSE and finding oddities.
  • openSUSE as the OS consuming most of the space.
  • LUKS encryption for openSUSE without LVM.
  • ext4’s new fancy ‘fast_commit’ feature in use during filesystem creation.
  • As a result of all that, I ended up juggling back and forth installation screens a couple of times (even more than shown below, and also because I forgot I wanted to use encryption the first time around).
First boots to pre-installed Ubuntu and installation of openSUSE Tumbleweed as the dual-boot option: 
 
(if the embedded video is not shown, use a direct link)
 
Some notes from the openSUSE installation:
  • openSUSE installer’s partition editor apparently does not support resizing or automatically installing side-by-side another Linux distribution, so I did part of the setup completely on my own.
  • Installation package download hanged a couple of times, only passed when I entered a mirror manually. On my TW I’ve also noticed download problems recently, there might be a problem with some mirror I need to escalate.
  • The installer doesn’t very clearly show encryption status of the target installation - it took me a couple of attempts before I even noticed the small “encrypted” column and icon (well, very small, see below), which also did not spell out the device mapper name but only the main partition name. In the end it was going to do the right thing right away and use my pre-created encrypted target partition as I wanted, but it could be a better UX. Then again I was doing my very own tweaks anyway.
  • Let’s not go to the details why I’m so old-fashioned and use ext4 :)
  • openSUSE’s installer does not work fine with HiDPI screen. Funnily the tty consoles seem to be fine and with a big font.
  • At the end of the video I install the two GNOME extensions I can’t live without, Dash to Dock and Sound Input & Output Device Chooser.

by TJ (noreply@blogger.com) at January 26, 2022 12:51 PM

December 14, 2021

Losca

Working and warming up cats

How to disable internal keyboard/touchpad when a cat arrives

I’m using an external keyboard (1) and mouse (2), but the laptop lid is usually still open for better cooling. That means the internal keyboard (3) and touchpad (4) – made of comfortable materials – are open to be used by a cat searching for warmth (7), in the obvious “every time” case that a normal non-heated nest (6) is not enough.

The problem is, everything goes chaotic at that point in the default configuration. The solution is to have quick shortcuts in my Dash to Dock (8) to both disable (10) and enable (9) keyboard and touchpad at a very rapid pace.

It is to be noted that I’m not disabling the touch screen (5) by default, because most of the time the cat is not leaning on it – there is also the added benefit that if one forgets about the internal keyboard and touchpad disabling and detaches the laptop from the USB-C monitor (11), there’s the possibility of using the touch screen and on-screen keyboard to type in the password and tap on the keyboard/touchpad enabling shortcut button again. If also touch screen was disabled, the only way would be to go back to an external keyboard or reboot.

So here are the scripts. First, the disabling script (pardon my copy-paste use of certain string manipulation tools):

dconf write /org/gnome/desktop/peripherals/touchpad/send-events "'disabled'"
sudo killall evtest
sudo evtest --grab $(sudo libinput list-devices | grep -A 1 "AT Translated Set 2 keyboard" | tail -n 1 | sed 's/.*\/dev/\/dev/') &
sudo evtest --grab $(sudo libinput list-devices | grep -A 1 "Dell WMI" | tail -n 1 | sed 's/.*\/dev/\/dev/') &
sudo evtest --grab $(sudo libinput list-devices | grep -A 1 "Power" | grep Kernel | tail -n 1 | sed 's/.*\/dev/\/dev/') &
sudo evtest --grab $(sudo libinput list-devices | grep -A 1 "Power" | grep Kernel | head -n 1 | sed 's/.*\/dev/\/dev/') &
sudo evtest --grab $(sudo libinput list-devices | grep -A 1 "Sleep" | grep Kernel | tail -n 1 | sed 's/.*\/dev/\/dev/') &
sudo evtest --grab $(sudo libinput list-devices | grep -A 1 "HID" | grep Kernel | head -n 1 | sed 's/.*\/dev/\/dev/') &
sudo evtest --grab $(sudo libinput list-devices | grep -A 1 "HID" | tail -n 1 | sed 's/.*\/dev/\/dev/') &
#sudo evtest --grab $(sudo libinput list-devices | grep -A 1 "ELAN" | tail -n 1 | sed 's/.*\/dev/\/dev/') # Touch screen

And the associated ~/.local/share/applications/disable-internal-input.desktop:

[Desktop Entry]
Version=1.0
Name=Disable internal input
GenericName=Disable internal input
Exec=/bin/bash -c /home/timo/Asiakirjat/helpers/disable-internal-input.sh
Icon=yast-keyboard
Type=Application
Terminal=false
Categories=Utility;Development;

Here’s the enabling script:

dconf write /org/gnome/desktop/peripherals/touchpad/send-events "'enabled'"
sudo killall evtest

and the desktop file:

[Desktop Entry]
Version=1.0
Name=Enable internal input
GenericName=Enable internal input
Exec=/bin/bash -c /home/timo/Asiakirjat/helpers/enable-internal-input.sh
Icon=/home/timo/.local/share/icons/hicolor/scalable/apps/yast-keyboard-enable.png
Type=Application
Terminal=false
Categories=Utility;Development;

With these, if I sense a cat or am just proactive enough, I press Super+9. If I’m about to detach my laptop from the monitor, I press Super+8. If I forget the latter (usually this is the case) and haven’t yet locked the screen, I just tap the enabling icon on the touch screen.

by TJ (noreply@blogger.com) at December 14, 2021 07:29 AM

October 28, 2021

Ville-Pekka Vainio

How I made Firefox much faster with an Estonian ID card

I haven’t blogged in almost ten years, wow. This time I discovered something that I think deserves a blog post.
I have an Estonian e-Residency because I speak Estonian and visit quite often (at least when there’s not a pandemic going on). My default Firefox profile is easily more than 10 years old. With the Estonian ID card inserted into a card reader, Firefox has always been very slow with that profile, pretty much unusable.

With a fresh Firefox profile everything has worked very well, there’s a bit of slowness that I can see when browsing with the ID card inserted compared to when the card is not in the reader, but it’s not significant. Today I wanted to register as a reader at the Tallinn Central Library, because they offer Estonian e-books that I would like to read. Having to open a fresh Firefox profile to browse a library web site irritated me enough that I started looking for a solution. I found the solution by reading the CAC page of the Arch wiki.

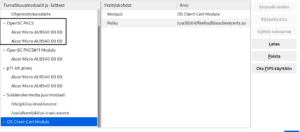
I went to Edit -> Settings -> Privacy & Security -> Security Devices. I saw that my old profile had both “OpenSC PKCS” and “OpenSC PKCS#11 Module” in there. The fresh profiles did not have the “OpenSC PKSC” entry. So I removed that one and now the browser works faster.

I typically use Finnish on the desktop, just because I believe everyone should be able to use free and open source software in their native language. I’ll attach a screenshot, which is in Finnish. The entry marked with a square is the one I had to remove. I’m using Firefox 93 on Fedora 35.

Screenshot of the security devices screen in Firefox.

by Ville-Pekka Vainio at October 28, 2021 07:09 PM

March 31, 2021

Losca

MotionPhoto / MicroVideo File Formats on Pixel Phones

Google Pixel phones support what they call ”Motion Photo” which is essentially a photo with a short video clip attached to it. They are quite nice since they bring the moment alive, especially as the capturing of the video starts a small moment before the shutter button is pressed. For most viewing programs they simply show as static JPEG photos, but there is more to the files.

I’d really love proper Shotwell support for these file formats, so I posted a longish explanation with many of the details in this blog post to a ticket there too. Examples of the newer format are linked there too.

Info posted to Shotwell ticket

There are actually two different formats, an old one that is already obsolete, and a newer current format. The older ones are those that your Pixel phone recorded as ”MVIMG_[datetime].jpg", and they have the following meta-data:

Xmp.GCamera.MicroVideo                       XmpText     1  1
Xmp.GCamera.MicroVideoVersion XmpText 1 1
Xmp.GCamera.MicroVideoOffset XmpText 7 4022143
Xmp.GCamera.MicroVideoPresentationTimestampUs XmpText 7 1331607

The offset is actually from the end of the file, so one needs to calculate accordingly. But it is exact otherwise, so one simply extract a file with that meta-data information:

#!/bin/bash
#
# Extracts the microvideo from a MVIMG_*.jpg file

# The offset is from the ending of the file, so calculate accordingly
offset=$(exiv2 -p X "$1" | grep MicroVideoOffset | sed 's/.*\"\(.*\)"/\1/')
filesize=$(du --apparent-size --block=1 "$1" | sed 's/^\([0-9]*\).*/\1/')
extractposition=$(expr $filesize - $offset)
echo offset: $offset
echo filesize: $filesize
echo extractposition=$extractposition
dd if="$1" skip=1 bs=$extractposition of="$(basename -s .jpg $1).mp4"

The newer format is recorded in filenames called ”PXL_[datetime].MP.jpg”, and they have a _lot_ of additional metadata:

Xmp.GCamera.MotionPhoto                      XmpText     1  1
Xmp.GCamera.MotionPhotoVersion XmpText 1 1
Xmp.GCamera.MotionPhotoPresentationTimestampUs XmpText 6 233320
Xmp.xmpNote.HasExtendedXMP XmpText 32 E1F7505D2DD64EA6948D2047449F0FFA
Xmp.Container.Directory XmpText 0 type="Seq"
Xmp.Container.Directory[1] XmpText 0 type="Struct"
Xmp.Container.Directory[1]/Container:Item XmpText 0 type="Struct"
Xmp.Container.Directory[1]/Container:Item/Item:Mime XmpText 10 image/jpeg
Xmp.Container.Directory[1]/Container:Item/Item:Semantic XmpText 7 Primary
Xmp.Container.Directory[1]/Container:Item/Item:Length XmpText 1 0
Xmp.Container.Directory[1]/Container:Item/Item:Padding XmpText 1 0
Xmp.Container.Directory[2] XmpText 0 type="Struct"
Xmp.Container.Directory[2]/Container:Item XmpText 0 type="Struct"
Xmp.Container.Directory[2]/Container:Item/Item:Mime XmpText 9 video/mp4
Xmp.Container.Directory[2]/Container:Item/Item:Semantic XmpText 11 MotionPhoto
Xmp.Container.Directory[2]/Container:Item/Item:Length XmpText 7 1679555
Xmp.Container.Directory[2]/Container:Item/Item:Padding XmpText 1 0

Sounds like fun and lots of information. However I didn’t see why the “length” in first item is 0 and I didn’t see how to use the latter Length info. But I can use the mp4 headers to extract it:

#!/bin/bash
#
# Extracts the motion part of a MotionPhoto file PXL_*.MP.mp4

extractposition=$(grep --binary --byte-offset --only-matching --text \
-P "\x00\x00\x00\x18\x66\x74\x79\x70\x6d\x70\x34\x32" $1 | sed 's/^\([0-9]*\).*/\1/')

dd if="$1" skip=1 bs=$extractposition of="$(basename -s .jpg $1).mp4"

UPDATE: I wrote most of this blog post earlier. When now actually getting to publishing it a week later, I see the obvious ie the ”Length” is again simply the offset from the end of the file so one could do the same less brute force approach as for MVIMG. I’ll leave the above as is however for the ❤️ of binary grepping.

UPDATE 08/2021: Here's the script to extract also MP without brute force:

#!/bin/bash
#
# Extracts the motion part of a MotionPhoto file PXL_*.MP.mp4

set -e
# Brute force
#extractposition=$(grep --binary --byte-offset --only-matching --text -P "\x00\x00\x00\x18\x66\x74\x79\x70\x6d\x70\x34\x32" $1 | sed 's/^\([0-9]*\).*/\1/')

# Metadata
offset=$(exiv2 -p x "$1" | grep Length | tail -n 1 |  rev | cut -d ' ' -f 1 | rev)
echo offset: ${offset}
re='^[0-9]+$'
if ! [[ $offset =~ $re ]] ; then
   echo "offset not found"
   exit 1
fi
filesize=$(du --apparent-size --block=1 "$1" | sed 's/^\([0-9]*\).*/\1/')

echo filesize: $filesize
extractposition=$(expr $filesize - $offset)
echo extractposition=$extractposition

dd if="$1" skip=1 bs=$extractposition of="$(basename -s .jpg $1).mp4"

(cross-posted to my other blog)

by TJ (noreply@blogger.com) at March 31, 2021 11:06 AM

March 11, 2020

Riku Voipio

This is the year not to fly

If you have to choose one year when you won't fly, this year, 2020, is the one to choose. Why? Because CORSIA.

What the heck is CORSIA?

CORSIA is not a novel virus, but "Carbon Offsetting and Reduction Scheme for International Aviation". In a nutshell, the aviation industry says they will freeze their co2 emissions from growing. Actually, aviation emissions are still going to grow. The airlines will just pay someone else to reduce emissions with the same amount aviation emissions rise - the "Offsetting" word in CORSIA. If that sounds like greenwashing, well it pretty much is. But that was expected. Getting every country and airline abroad CORSIA would not have been possible if the scheme would actually bite. So it's pretty much a joke.

What does it have to do with *this* Year?

The first phase of CORSIA will start next year, so the emissions are frozen to year 2020 levels. Due to certain recent events, lots of flights have already been cancelled - which means the reference year aviation emissions are already a lot less than the aviation industry was expecting. By avoiding flying this year, the aviation emissions are going to be frozen at an even lower level. This will increase cost of co2 offsetting for airlines, and the joke is going to be on them.

So consider skipping business travel and taking your holiday trip this year with something else than a plane. Wouldn't recommend a cruise ship, tho...

by Riku Voipio (noreply@blogger.com) at March 11, 2020 08:43 PM

June 08, 2019

Viikon VALO

Jupyter Notebook

Jupyter Notebook on datatieteilijöiden keskuudessa suosittu ohjelmointiympäristö, jolla luodaan tekstiä, kuvia ja ohjelmointikieltä yhdistäviä muistioita. Tietotekniikan maailmassa on noussut trendikkääksi termiksi datatiede, jolla pyritään tilastollisin menetelmin ja koneoppimisen keinoin löytämään tietomassasta poikkeamia, toistuvia malleja ja sääntöjä. Esimerkiksi datatieteilijä voi selvittää asiakkaan ostohistorian perusteella, mitä tuotetta kannattaa seuraavaksi suositella. Tämän tyylisiä analyyseja voi tehdä useilla eri välineillä, mutta suosituiksi työkaluiksi ovat tulleet Python-ohjelmointikieli ja sen kehitysympäristö Jupyter Notebook. Jupyter Notebook on selaimella käytettävä ohjelmointityökalu, jolla voi Pythonin lisäksi ohjelmoida useilla eri kielillä, kuten R:llä, Julialla tai Octavella, kunhan asentaa tarvittavat ytimet.

June 08, 2019 05:30 AM

March 23, 2019

Riku Voipio

On the #uploadfilter problem

The copyright holders in europe are pushing hard mandate upload filters for internet. We have been here before - when they outlawed circumventing DRM. Both have roots in the same problem. The copyright holders look at computers and see bad things happening to their revenue. They come to IT companies and say "FIX IT". It industry comes back and says.. "We cant.. making data impossible to copy is like trying to make water not wet!". But we fail at convincing copyright holders in how perfect DRM or upload filter is not possible. Then copyright holders go to law makers and ask them in turn to fix it.

We need to turn tables around. If they want something impossible, it should be upto them to implement it.

It is simply unfair to require each online provider to implement an AI to detect copyright infringement, manage a database of copyrighted content and pay for the costs running it all.. ..And getting slapped with a lawsuit anyways, since copyrighted content is still slipping through.

The burden of implementing #uploadfilter should be on the copyright holder organizations. Implement as a SaaS. Youtube other web platforms call your API and pay $0.01 each time a pirate content is detected. On the other side, to ensure correctness of the filter, copyright holders have to pay any lost revenue, court costs and so on for each false positive.

Filtering uploads is still problematic. But it's now the copyright holders problem. Instead people blaming web companies for poor filters, it's the copyright holders now who have to answer to the public why their filters are rejecting content that doesn't belong to them.

by Riku Voipio (noreply@blogger.com) at March 23, 2019 04:07 PM

February 26, 2019

Riku Voipio

Linus Torvalds is wrong - PC no longer defines a platform

Hey, I can do these clickbait headlines too! Recently it has gotten media's attention that Linus is dismissive of ARM servers. The argument is roughly "Developers use X86 PCs, cross-platform development is painful, and therefor devs will use X86 servers, unless they get ARM PCs to play with".

This ignores the reality where majority of developers do cross-platform development every day. They develop on Mac and Windows PC's and deploy on Linux servers or mobile phones. The two biggest Linux success stories, cloud and Android, are built on cross-platform development. Yes, cross-platform development sucks. But it's just one of the many things that sucks in software development.

More importantly, the ship of "local dev enviroment" has long since sailed. Using Linus's other great innovation, git, developers push their code to a Microsoft server, which triggers a Rube Goldberg machine of software build, container assembly, unit tests, deployment to test environment and so on - all in cloud servers.

Yes, the ability to easily by a cheap whitebox PC from CompUSA was the important factor in making X86 dominate server space. But people get cheap servers from cloud now, and even that is getting out of fashion. Services like AWS lambda abstract the whole server away, and the instruction set becomes irrelevant. Which CPU and architecture will be used to run these "serverless" services is not going to depend on developers having Arm Linux Desktop PC's.

Of course there are still plenty of people like me who use Linux Desktop and run things locally. But in the big picture things are just going one way. The way where it gets easier to test things in your git-based CI loop rather than in local development setup.

But like Linus, I still do want to see an powerful PC-like Arm NUC or Laptop. One that could run mainline Linux kernel and offer a PC-like desktop experience. Not because ARM depends on it to succeed in server space (what it needs is out of scope for this blogpost) - but because PC's are useful in their own.

by Riku Voipio (noreply@blogger.com) at February 26, 2019 09:03 PM

October 28, 2018

Viikon VALO

Power Ampache

Power Ampache on musiikkia verkon yli Ampache-palvelimelta soittava Android-sovellus. Musiikin soittamisessa on viime vuosina tapahtunut voimakas siirtymä ostetuista cd-levyistä ja omalla laitteella olevista musiikkitiedostoista verkon suoratoistopalveluiden, kuten Spotifyn käyttöön. Kun mobiililaitteiden verkkoyhteyksistä on tullut nopeampia ja luotettavampia, eivät käyttäjät vaivaudu enää kopioimaan haluamaansa musiikkia mobililaitteelleen vaan kuuntelevat musiikin usein suoraan verkosta. Musiikkitiedostoja ei tarvitse myöskään synkronoida useamman laitteen välillä. Toisinaan on kuitenkin syitä, joiden takia itselle ostetut ja omalle laitteelle ladatut musiikkitiedostot ovat parempi vaihtoehto.

October 28, 2018 12:30 PM

September 01, 2018

Viikon VALO

Nextcloud

Nextcloud on pilvipalvelualusta, jonka voi asentaa omalle palvelimelle. Omassa ylläpidossa oma data on omassa hallinnassa. Kun on tarve käyttää pilveen synkronoitavia palveluita, kuten tiedostojen, yhteystietojen ja kalenterin synkronointia useamman laitteen välillä, muttei halua luottaa tietojaan suurten palveluntarjoajien haltuun, on itse omalla palvelimella ylläpidettävä Nextcloud hyvä vaihtoehto. Näkyvimpänä ominaisuutena Nextcloudissa on tiedostojen pilvitallennus, joka vastaa esimerkiksi Dropbox-, GoogleDrive- ja OneCloud-palveluita. Sen lisäksi Nextcloud voi kuitenkin sisältää myös monia muita sovelluksia, joita siihen on mahdollista asentaa sisäänrakennetun sovellusvalikoiman kautta.

September 01, 2018 12:02 PM

August 28, 2018

Losca

Repeated prompts for SSH key passphrase after upgrading to Ubuntu 18.04 LTS?

This was a tricky one (for me, anyway) so posting a note to help others.

The problem was that after upgrading to Ubuntu 18.04 LTS from 16.04 LTS, I had trouble with my SSH agent. I was always being asked for the passphrase again and again, even if I had just used the key. This wouldn't have been a showstopper otherwise, but it made using virt-manager over SSH impossible because it was asking for the passphrase tens of times.

I didn't find anything on the web, and I didn't find any legacy software or obsolete configs to remove to fix the problem. I only got a hint when I tried ssh-add -l, with which I got the error message ”error fetching identities: Invalid key length”. This lead me on the right track, since after a while I started suspecting my old keys in .ssh that I hadn't used for years. And right on: after I removed one id_dsa (!) key and one old RSA key from .ssh directory (with GNOME's Keyring app to be exact), ssh-add -l started working and at the same time the familiar SSH agent behavior resumed and I was able to use my remote VMs fine too!

Hope this helps.

ps. While at the topic, remember to upgrade your private keys' internal format to the new OpenSSH format from the ”worse than plaintext” format with the -o option: blog post – tl; dr; ssh-keygen -p -o -f id_rsa and retype your passphrase.

by TJ (noreply@blogger.com) at August 28, 2018 07:46 AM

August 26, 2018

Viikon VALO

Joplin

Vapaa ojelmisto muistiinpanojen ja tehtävälistojen tekemiseen, järjestämiseen muistikirjoiksi sekä synkronoimiseen eri laitteille. Joplinissa käyttäjä voi organisoida muistiinpanonsa muistikirjoiksi, joita voi järjestellä myös sisäkkäin. Yksittäiset muistiinpanot ovat tyypiltään joko pelkkiä muistiinpanoja taikka tehtäviä. Muistiinpano on Markdown-kielellä kirjoitettu teksti. Teksti voi sisältää muun muassa: otsikoita kappaleita listoja todo-listoja, joissa lista-alkion eteen tulee rastiruutu linkkejä kuvia Tavallisten Markdown-ominaisuuksien lisäksi Joplin tukee LaTeX-muodossa kirjoitettua matematiikkaa. Muistiinpanoon voi lisäksi liittää liitetiedostoja, esimerkiksi kuvia tai muita liitteitä, sekä aihetunnisteita (tageja).

August 26, 2018 08:04 AM

May 07, 2018

Losca

Converting an existing installation to LUKS using luksipc - 2018 notes

Time for a laptop upgrade. Encryption was still not the default for the new Dell XPS 13 Developer Edition (9370) that shipped with Ubuntu 16.04 LTS, so I followed my own notes from 3 years ago together with the official documentation to convert the unencrypted OEM Ubuntu installation to LUKS during the weekend. This only took under 1h altogether.

On this new laptop model, EFI boot was already in use, Secure Boot was enabled and the SSD had GPT from the beginning. The only thing I wanted to change thus was the / to be encrypted.

Some notes for 2018 to clarify what is needed and what is not needed:
  • Before luksipc, remember to resize existing partitions to have 10 MB of free space at the end of the / partition, and also create a new partition of eg 1 GB size partition for /boot.
  • To get the code and compile luksipc on Ubuntu 16.04.4 LTS live USB, just apt install git build-essential is needed. cryptsetup package is already installed.
  • After luksipc finishes and you've added your own passphrase and removed the initial key (slot 0), it's useful to cryptsetup luksOpen it and mount it still under the live session - however, when using ext4, the mounting fails due to a size mismatch in ext4 metadata! This is simple to correct: sudo resize2fs /dev/mapper/root. Nothing else is needed.
  • I mounted both the newly encrypted volume (to /mnt) and the new /boot volume (to /mnt2 which I created), and moved /boot/* from the former to latter.
  • I edited /etc/fstab of the encrypted volume to add the /boot partition
  • Mounted as following in /mnt:
    • mount -o bind /dev dev
    • mount -o bind /sys sys
    • mount -t proc proc proc
  • Then:
    • chroot /mnt
    • mount -a # (to mount /boot and /boot/efi)
    • Edited files /etc/crypttab (added one line: root UUID none luks) and /etc/grub/default (I copied over my overkill configuration that specifies all of cryptopts and cryptdevice some of which may be obsolete, but at least one of them and root=/dev/mapper/root is probably needed).
    • Ran grub-install ; update-grub ; mkinitramfs -k all -c (notably no other parameters were needed)
    • Rebooted.
  • What I did not need to do:
    • Modify anything in /etc/initramfs-tools.
If the passphrase input shows on your next boot, but your correct passphrase isn't accepted, it's likely that the initramfs wasn't properly updated yet. I first forgot to run the mkinitramfs command and faced this.

by TJ (noreply@blogger.com) at May 07, 2018 11:08 AM

February 13, 2018

Riku Voipio

Making sense of /proc/cpuinfo on ARM

Ever stared at output of /proc/cpuinfo and wondered what the CPU is?

...
processor : 7
BogoMIPS : 2.40
Features : fp asimd evtstrm aes pmull sha1 sha2 crc32 cpuid
CPU implementer : 0x41
CPU architecture: 8
CPU variant : 0x0
CPU part : 0xd03
CPU revision : 3
Or maybe like:

$ cat /proc/cpuinfo
processor : 0
model name : ARMv7 Processor rev 2 (v7l)
BogoMIPS : 50.00
Features : half thumb fastmult vfp edsp thumbee vfpv3 tls idiva idivt vfpd32 lpae
CPU implementer : 0x56
CPU architecture: 7
CPU variant : 0x2
CPU part : 0x584
CPU revision : 2
...
The bits "CPU implementer" and "CPU part" could be mapped to human understandable strings. But the Kernel developers are heavily against the idea. Therefor, to the next idea: Parse in userspace. Turns out, there is a common tool almost everyone has installed does similar stuff. lscpu(1) from util-linux. So I proposed a patch to do ID mapping on arm/arm64 to util-linux, and it was accepted! So using lscpu from util-linux 2.32 (hopefully to be released soon) the above two systems look like:

Architecture: aarch64
Byte Order: Little Endian
CPU(s): 8
On-line CPU(s) list: 0-7
Thread(s) per core: 1
Core(s) per socket: 4
Socket(s): 2
NUMA node(s): 1
Vendor ID: ARM
Model: 3
Model name: Cortex-A53
Stepping: r0p3
CPU max MHz: 1200.0000
CPU min MHz: 208.0000
BogoMIPS: 2.40
L1d cache: unknown size
L1i cache: unknown size
L2 cache: unknown size
NUMA node0 CPU(s): 0-7
Flags: fp asimd evtstrm aes pmull sha1 sha2 crc32 cpuid
And

$ lscpu
Architecture: armv7l
Byte Order: Little Endian
CPU(s): 4
On-line CPU(s) list: 0-3
Thread(s) per core: 1
Core(s) per socket: 4
Socket(s): 1
Vendor ID: Marvell
Model: 2
Model name: PJ4B-MP
Stepping: 0x2
CPU max MHz: 1333.0000
CPU min MHz: 666.5000
BogoMIPS: 50.00
Flags: half thumb fastmult vfp edsp thumbee vfpv3 tls idiva idivt vfpd32 lpae
As we can see, lscpu is quite versatile and can show more information than just what is available in cpuinfo.

by Riku Voipio (noreply@blogger.com) at February 13, 2018 07:18 PM

June 24, 2017

Riku Voipio

Cross-compiling with debian stretch

Debian stretch comes with cross-compiler packages for selected architectures:
 $ apt-cache search cross-build-essential
crossbuild-essential-arm64 - Informational list of cross-build-essential packages for
crossbuild-essential-armel - ...
crossbuild-essential-armhf - ...
crossbuild-essential-mipsel - ...
crossbuild-essential-powerpc - ...
crossbuild-essential-ppc64el - ...

Lets have a quick exact steps guide. But first - while you can use do all this in your desktop PC rootfs, it is more wise to contain yourself. Fortunately, Debian comes with a container tool out of box:

sudo debootstrap stretch /var/lib/container/stretch http://deb.debian.org/debian
echo "strech_cross" | sudo tee /var/lib/container/stretch/etc/debian_chroot
sudo systemd-nspawn -D /var/lib/container/stretch
Then we set up cross-building enviroment for arm64 inside the container:

# Tell dpkg we can install arm64
dpkg --add-architecture arm64
# Add src line to make "apt-get source" work
echo "deb-src http://deb.debian.org/debian stretch main" >> /etc/apt/sources.list
apt-get update
# Install cross-compiler and other essential build tools
apt install --no-install-recommends build-essential crossbuild-essential-arm64
Now we have a nice build enviroment, lets choose something more complicated than the usual kernel/BusyBox to cross-build, qemu:

# Get qemu sources from debian
apt-get source qemu
cd qemu-*
# New in stretch: build-dep works in unpacked source tree
apt-get build-dep -a arm64 .
# Cross-build Qemu for arm64
dpkg-buildpackage -aarm64 -j6 -b
Now that works perfectly for Qemu. For other packages, challenges may appear. For example you may have to se "nocheck" flag to skip build-time unit tests. Or some of the build-dependencies may not be multiarch-enabled. So work continues :)

by Riku Voipio (noreply@blogger.com) at June 24, 2017 04:03 PM

January 01, 2017

Viikon VALO

ReText

ReText on yksinkertainen, mutta tehokas, työkalu tekstien ja muistiinpanojen kirjoittamiseen Markdown-, reStructuredText- tai Textile-merkintäkielillä. Markdown, reStructuredText ja Textile ovat merkintäkieliä, joilla muotoiluja sisältäviä tekstidokumentteja voidaan kirjoittaa puhtaasti tekstimuotoisena. Valmis dokumentti käännetään yleensä näytettäväksi johonkin toiseen muotoon, kuten html- tai pdf-tiedostoiksi. Näissä kielissä muotoilut merkitään mahdollisimman luonnollisilla tavoin, jolloin myös merkintäkielinen alkuperäinen teksti pysyy helposti luettavana. Esimerkiksi luettelot merkitään rivin aloittavilla "-"-merkeillä. ReText on sovellus, jolla näillä kielillä kirjoitettujen dokumenttien muokkaaminen on helppoa.

January 01, 2017 02:00 PM

March 30, 2013

Jouni Roivas

QGraphicsWidget

Usually it's easy to get things working with Qt (http://qt-project.org), but recently I encoutered an issue when trying to implement simple component derived from QGraphicsWidget. My initial idea was to use QGraphicsItem, so I made this little class:

class TestItem : public QGraphicsItem
{
public:
TestItem(QGraphicsItem *parent=0) : QGraphicsItem(parent) {}
void paint(QPainter *painter, const QStyleOptionGraphicsItem *option, QWidget *widget = 0);
virtual QRectF boundingRect () const;

protected:
virtual void mousePressEvent(QGraphicsSceneMouseEvent *event);
virtual void mouseReleaseEvent(QGraphicsSceneMouseEvent *event);
};

void TestItem::mousePressEvent(QGraphicsSceneMouseEvent *event)
{
qDebug() << __PRETTY_FUNCTION__ << "press";
}

void TestItem::mouseReleaseEvent(QGraphicsSceneMouseEvent *event)
{
qDebug() << __PRETTY_FUNCTION__ << "release";
}

void TestItem::paint(QPainter *painter, const QStyleOptionGraphicsItem *option, QWidget *widget)
{
Q_UNUSED(option)
Q_UNUSED(widget)
painter->fillRect(boundingRect(), QColor(255,0,0,100));
}

QRectF TestItem::boundingRect () const
{
return QRectF(-100, -40, 100, 40);
}
Everything was working like expected, but in order to use a QGraphicsLayout, I wanted to derive that class from QGraphicsWidget. The naive way was to make minimal changes:

class TestWid : public QGraphicsWidget
{
Q_OBJECT
public:
TestWid(QGraphicsItem *parent=0) : QGraphicsWidget(parent) { }
void paint(QPainter *painter, const QStyleOptionGraphicsItem *option, QWidget *widget = 0);
virtual QRectF boundingRect () const;

protected:
virtual void mousePressEvent(QGraphicsSceneMouseEvent *event);
virtual void mouseReleaseEvent(QGraphicsSceneMouseEvent *event);
};

void TestWid::mousePressEvent(QGraphicsSceneMouseEvent *event)
{
qDebug() << __PRETTY_FUNCTION__ << "press";
}

void TestWid::mouseReleaseEvent(QGraphicsSceneMouseEvent *event)
{
qDebug() << __PRETTY_FUNCTION__ << "release";
}

void TestWid::paint(QPainter *painter, const QStyleOptionGraphicsItem *option, QWidget *widget)
{
Q_UNUSED(option)
Q_UNUSED(widget)
painter->fillRect(boundingRect(), QColor(0,0,255,100));
}

QRectF TestWid::boundingRect () const
{
return QRectF(-100, -40, 100, 40);
}

Pretty straightforward, isn't it? It showed and painted things like expected, but I didn't get any mouse events. Wait what?

I spent hours just trying out things and googling this problem. I knew I had this very same issue earlier but didn't remember how I solved it. Until I figured out a very crucial thing, in case of QGraphicsWidget you must NOT implement boundingRect(). Instead use setGeometry for the object.

So the needed changes was to remote the boundingRect() method, and to call setGeometry in TestWid constructor:

setGeometry(QRectF(-100, -40, 100, 40));

After these very tiny little changes I finally got everthing working. That all thing made me really frustrated. Solving this issue didn't cause good feeling, I was just feeling stupid. Sometimes programming is a great waste of time.
by Jouni Roivas (noreply@blogger.com) at March 30, 2013 01:57 PM

August 31, 2012

Jouni Roivas

Adventures in Ubuntu land with Ivy Bridge

Recently I got a Intel Ivy Bridge based laptop. Generally I'm quite satisfied with it. Of course installed latest Ubuntu on it. First problem was EFI boot and BIOS had no other options. Best way to work around it was to use EFI aware grub2. I wanted to keep the preinstalled Windows 7 there for couple of things, so needed dual boot.

After digging around this German links was most relevant and helpful: http://thinkpad-forum.de/threads/123262-EFI-Grub2-Multiboot-HowTo.

In the end all I needed to do was to install Grub2 to EFI boot parition (/dev/sda1 on my case) and create the grub.efi binary under that. Then just copy /boot/grub/grub.cfg under it as well. On BIOS set up new boot label to boot \EFI\grub\grub.efi

After using the system couple of days found out random crashes. The system totally hanged. Finally traced the problem to HD4000 graphics driver: http://partiallysanedeveloper.blogspot.fi/2012/05/ivy-bridge-hd4000-linux-freeze.html

Needed to update Kernel. But which one? After multiple tries, I took the "latest" and "shiniest" one: http://kernel.ubuntu.com/~kernel-ppa/mainline/v3.4-precise/. With that kernel I got almost all the functionality and stability I needed.

However one BIG problem: headphones. I got sound normally from the speakers but after plugging in the headphones I got nothing. This problem seems to be on almost all the kernels I tried. Then I somehow figured out a important thing related to this. When I boot with headphone plugged in I got no sound from them. When I boot WITHOUT headphones plugged then they work just fine. Of course I debugged this problem all the time with the headphones plugged in and newer noticed this could be some weird detection problem. Since I kind of found solution for this I didn't bother to google it down. And of course Canonical does not provide support for unsupported kernels. If I remember correctly with the original Ubuntu 12.04 kernel this worked, but the HD4000 problem is on my scale bigger one than remember to boot without plugging anything to the 3.5" jack....

Of course my hopes are on 12.10 and don't want to dig it deeper, just wanted to inform you about this one.

by Jouni Roivas (noreply@blogger.com) at August 31, 2012 07:57 PM

July 04, 2012

Ville-Pekka Vainio

SSD TRIM/discard on Fedora 17 with encypted partitions

I have not blogged for a while, now that I am on summer holiday and got a new laptop I finally have something to blog about. I got a Thinkpad T430 and installed a Samsung SSD 830 myself. The 830 is not actually the best choice for a Linux user because you can only download firmware updates with a Windows tool. The tool does let you make a bootable FreeDOS USB disk with which you can apply the update, so you can use a Windows system to download the update and apply it just fine on a Linux system. The reason I got this SSD is that it is 7 mm in height and fits into the T430 without removing any spacers.

I installed Fedora 17 on the laptop and selected drive encryption in the Anaconda installer. I used ext4 and did not use LVM, I do not think it would be of much use on a laptop. After the installation I discovered that Fedora 17 does not enable SSD TRIM/discard automatically. That is probably a good default, apparently all SSDs do not support it. When you have ext4 partitions encrypted with LUKS as Anaconda does it, you need to change two files and regenerate your initramfs to enable TRIM.

First, edit your /etc/fstab and add discard to each ext4 mount. Here is an example of my root mount:
/dev/mapper/luks-secret-id-here / ext4 defaults,discard 1 1

Second, edit your /etc/crypttab and add allow-discards to each line to allow the dmcrypt layer to pass TRIM requests to the disk. Here is an example:
luks-secret-id-here UUID=uuid-here none allow-discards

You need at least dracut-018-78.git20120622.fc17 for this to work, which you should already have on an up-to-date Fedora 17.

Third, regenerate your initramfs by doing dracut -f. You may want to take a backup of the old initramfs file in /boot but then again, real hackers do not make backups 😉 .

Fourth, reboot and check with cryptsetup status luks-secret-id-here and mount that your file systems actually use discard now.

Please note that apparently enabling TRIM on encrypted file systems may reveal unencrypted data.

by Ville-Pekka Vainio at July 04, 2012 06:14 PM

October 29, 2011

Ville-Pekka Vainio

Getting Hauppauge WinTV-Nova-TD-500 working with VDR 1.6.0 and Fedora 16

The Hauppauge WinTV-Nova-TD-500 is a nice dual tuner DVB-T PCI card (well, actually it’s a PCI-USB thing and the system sees it as a USB device). It works out-of-the-box with the upcoming Fedora 16. It needs a firmware, but that’s available by default in the linux-firmware package.

However, when using the Nova-TD-500 with VDR a couple of settings need to be tweaked or the signal will eventually disappear for some reason. The logs (typically /var/log/messages in Fedora) will have something like this in them:
vdr: [pidnumber] PES packet shortened to n bytes (expected: m bytes)
Maybe the drivers or the firmware have a bug which is only triggered by VDR. This problem can be fixed by tweaking VDR’s EPG scanning settings. I’ll post the settings here in case someone is experiencing the same problems. These go into /etc/vdr/setup.conf in Fedora:


EPGBugfixLevel = 0
EPGLinger = 0
EPGScanTimeout = 0

It is my understanding that these settings will disable all EPG scanning which is done in the background and VDR will only scan the EPGs of the channels on the transmitters it is currently tuned to. In Finland, most of the interesting free-to-air channels are on two transmitters and the Nova-TD-500 has two tuners, so in practice this should not cause much problems with outdated EPG data.

by Ville-Pekka Vainio at October 29, 2011 06:07 PM

March 21, 2011

Jouni Roivas

Wayland

Recently Wayland have become a hot topic. Canonical has announced that Ubuntu will go to Wayland. Also MeeGo has great interest on it.

Qt has had (experimental) Wayland client support for some time now.

A very new thing is support for Qt as Wayland server. With that one can easily make own Qt based Wayland compositor. This is huge. Since this the only working Wayland compositor has been under wayland-demos. Using Qt for this opens many opportunities.

My vision is that Wayland is the future. And the future might be there sooner than you think...

by Jouni Roivas (noreply@blogger.com) at March 21, 2011 09:42 AM

February 24, 2011

Jouni Roivas

November 29, 2010

Jouni Roivas

Encrypted rootfs on MeeGo 1.1 netbook

I promised my scripts to encrypt the rootfs on my Lenovo Ideapad running MeeGo 1.1. It's currently just a dirty hack but thought it could be nice to share it with you.

My scripts uses cryptoloop. Unfortunately MeeGo 1.1 netbook stock kernel didn't support md_crypt so that was a no go. Of course I could compile the module myself but I wanted out-of-the box solution.

Basic idea is to create custom initrd and use it. My solution needs Live USB stick to boot and do the magic. Also another USB drive is needed to get the current root filesystem in safe while encrypting the partition. I don't know if it's possible to encrypt "in place" meaning to use two loopback devices. However this is the safe solution.

For the busy ones, just boot the MeeGo 1.1 Live USB and grab these files:
http://kaaos.huutonauru.net/meego/netbook_rootfs_crypt/crypt_hd.sh
http://kaaos.huutonauru.net/meego/netbook_rootfs_crypt/mkcryptrd.sh

Then:
chmod a+x crypt_hd.sh mkcryptrd.sh
su
./crypt_hd.sh

And follow the instructions.

The ones who have more time and want to double check everything, please follow instructions at: http://kaaos.huutonauru.net/meego/netbook_rootfs_crypt/README

This solution has at least one drawback. Once the kernel updates you have to recreate the initrd. For that purposes I created a tiny script than can be run after kernel update:
http://kaaos.huutonauru.net/meego/netbook_rootfs_crypt/update_initrd.sh

That script also needs the mkcryptrd.sh script above.

Of course that may break your system at any time, so be warned.

For my Lenovo Ideapad S10-3t and MeeGo 1.1 netbook it worked fine. My test case was to make very fresh installation first from the Live/installation USB. Boot again and setup the cryptoloop from Live USB. After that I could easily boot my crypted MeeGo 1.1. It asks password in very early phase of boot process. After it's written correctly the MeeGo 1.1 system should boot up normally.

This worked for me, and I give no guarantee that this works for you. However you're welcome to send patches and improvements.

UPDATE 29.11.2010:
Some people have reported problems when they have different kernel version than on Live USB. The're unable to boot back to their system. I try to figure out solution for this issue.

by Jouni Roivas (noreply@blogger.com) at November 29, 2010 12:48 PM

October 12, 2009

Vapaakoodi

Finhack tulee taas, tule sinäkin!

Finhack on kahdesti vuodessa järjestettävä vapaa tapaaminen suomalaisille vapaaohjelmistoaktiiveille. Finhack Syksy ‘09 järjestetään tällä kertaa ensi lauantaina 17.10 Forssan Ammattikorkeakoululla (Wahreeninkatu 11). Ohjelmassa on mm. LinuCastin nauhoitusta Henrik Anttosen johdolla, Timo Jyringin ja Niklas Laxströmin DDTP-työpaja, Hannu Mäkäräisen johdanto Freejam projektiin sekä Otto Kekäläisen tilannekatsaus Suomen vapaaohjelmistoelämään ja FSFE:n suomen jaoston perustaminen.

Lisää tietoa ohjelmasta löydät Finhackin kotisivuilta.

Tapahtumaan on vapaa pääsy, eikä edellytä etukäteisrekisteröintiä. Kuitenkin järjestäjiä auttaisi, jos pistäisit nimesi osallistujalistaan.

Nähdään paikanpäällä!

Terveisin,
Ville “Solarius” Sundell
Järjestäjä

PS. Tätä viestiä saa levittää vapaasti muuttamattomana, blogeissa, foorumeilla, postituslistoilla ja missä nyt ikinä keksitkään 🙂

by Solarius at October 12, 2009 11:29 AM

March 27, 2009

Vapaakoodi

Kiitä kehittäjää!

Nyt on ensimmäinen kansainvälinen Kiitä kehittäjääsi-päivä, keitä sinä ajattelit kiittää? Itse aamuyöstä kiitin Daniel J. Bernsteiniä tietoturvallisista ratkaisuista, sekä Transmission-bittorrent asiakasohjelman nykyistä kehittäjää Charles Kerriä hyvästä ohjelmasta, sekä Timo Jyrinkiä pitkäaikaisesta työstä suomalaisen vapaaohjelmistoyhteisön hyväksi. Tänään olisi tarkoitus lähettää vielä JWM:n kehittäjälle postia, sekä luultavasti pariin muuhunkin projektiin.

Kiitä sinäkin kehittäjiä jotka ovat vaikuttaneet tietokoneen käyttöösi!

by Solarius at March 27, 2009 12:29 PM

March 07, 2009

Vapaakoodi

Arvosta vapaiden ohjelmistojen kehittäjiä – Thank a Dev Day

Thank a Dev Day on päivä, jonka tarkoituksena on muistaa niitä henkilöitä, jotka ovat suosikkikoodisi takana. Tänävuonna sitä vietetään 27.3, ja tästä eteenpäin joka vuoden maaliskuun viimeinen perjantai.

Muista sinäkin sitä henkilöä, jonka koet muuttaneesi sinun tietokoneen käyttöä, tai muuten vaan saanut hyvälle mielelle!

by Solarius at March 07, 2009 12:57 AM

November 22, 2008

Vapaakoodi

Finhack tapaaminen tulee – tule sinäkin!

Eli, Finhack vapaaohjelmisto-tapahtuma järjestetään Lauantaina 29.11 HAMKin Forssan toimipisteellä.

Kaikki vapaista ohjelmistoista kiinnostuneet ovat tervetulleita.

Lisätietoa löytyy täältä: finhack.pieni.net

by Solarius at November 22, 2008 01:26 PM

July 15, 2008

Vapaakoodi

identi.ca & laconi.ca – vapaata mikroblogausta

www.identi.ca on mikroblogi-sivusto, muista, kuten Twitteristä ja Jaikusta poiketen, se kuitenkin perustuu Laconica-ohjelmistoon, joka on Affero GPL:n alla.

Tästä sivustosta vinkin antoi Mirv, #vapaakoodi-kanavalla.

by Solarius at July 15, 2008 10:03 PM